Have you ever heard of kintsugi? It is also called kintsukuroi.
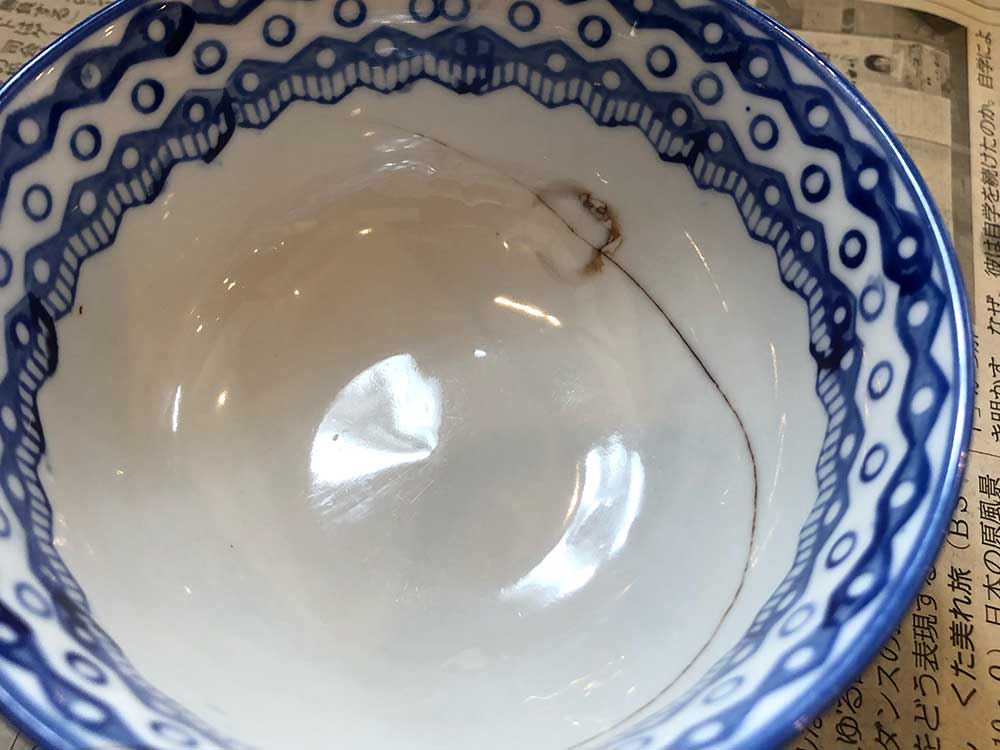
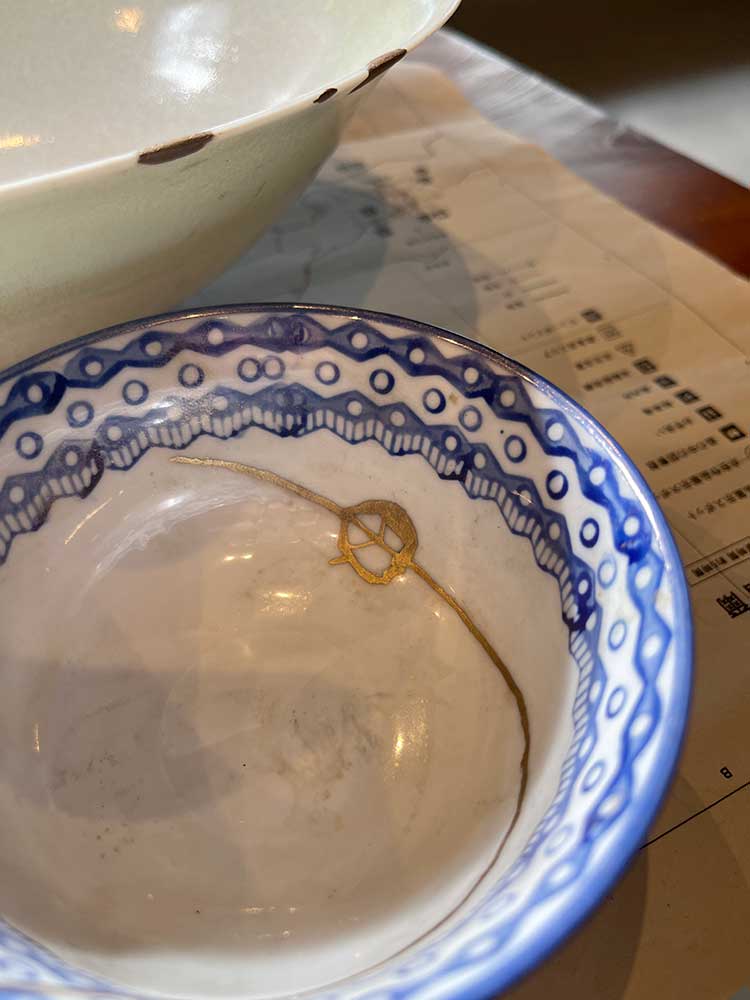
If this doesn't ring a bell, have you ever seen porcelain with gold lines, like the one in this photo? It is a traditional Japanese technique for repairing broken ceramic ware, finished by sprinkling gold powder on the surface.
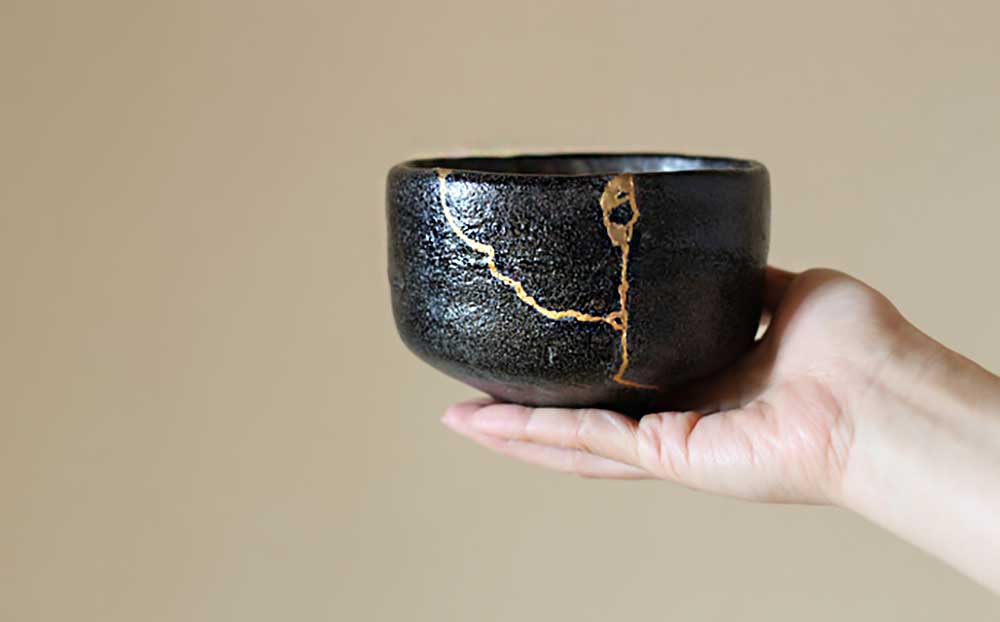
Some people are attracted to the spirit of wabi-sabi, a uniquely Japanese concept that finds beauty in imperfection — the finished product is more beautiful and stronger than the original, and its imperfection is accepted as part of its unique character rather than something to be hidden.
Not many Japanese people know about Kintsugi, but it is gradually gaining attention. More workshops are offered in major cities. If you live in Japan, you might run into someone who has tried kintsugi. I had long wanted to try it, too.
One day, I heard there was a place in the East Nara Nabari area where I could experience kintsugi. I went there right away with my cracked and chipped bowls.
Learning How to do Kintsugi at an Urushi Studio
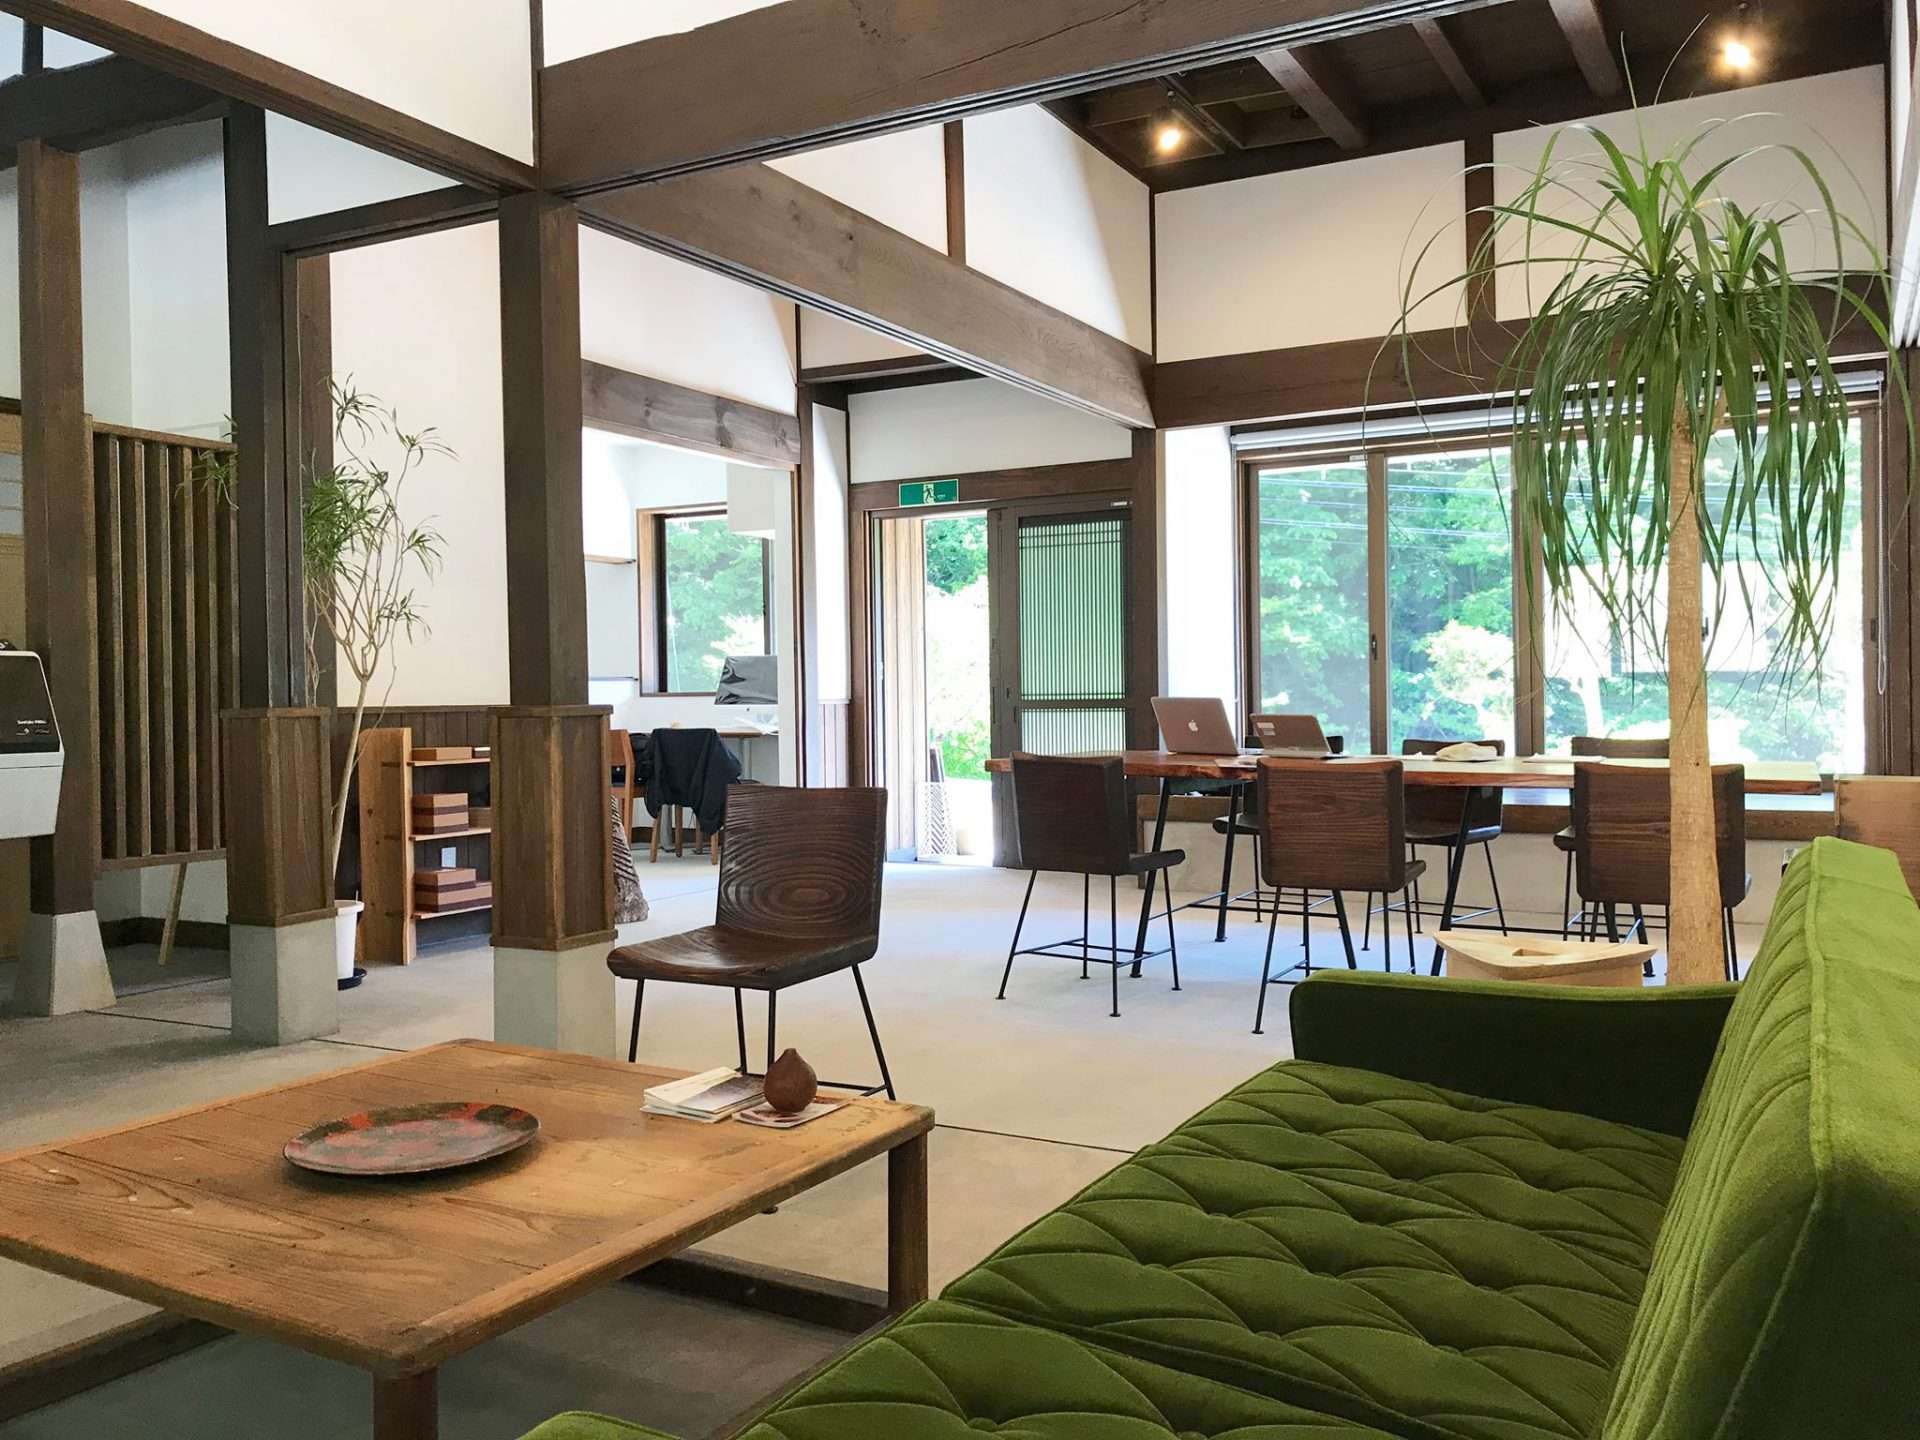
May, who often writes on this site, and I visited Urushi Base Soni “Nenrin,” a lovely community space in a renovated kominka or old Japanese folk house. Located in Soni Village, Nara Prefecture, the birthplace of the urushi industry, Nenrin is a base for activities to revive urushi culture and techniques.
Kintsugi Means Golden Joinery. But Why Urushi?
Hearing the word urushi, I am sure I am not the only one who thinks of a shiny urushi lacquered bowl . Kintsugi reminds many people of decorating ceramics with gold powder. However, there are many careful and special steps using urushi lacquer before reaching the stage where gold powder can be applied. I am ashamed to say I did not know that. Did you? Today, there is convenient modern kintsugi that uses epoxy resins instead of urushi, but my first kintsugi experience was the traditional one.

First, I learned about urushi at Nenrin. There are two kinds of lacquer, Chinese and Japanese. These two kinds of lacquers differ in texture, thus are used for different purposes. Prices vary too.
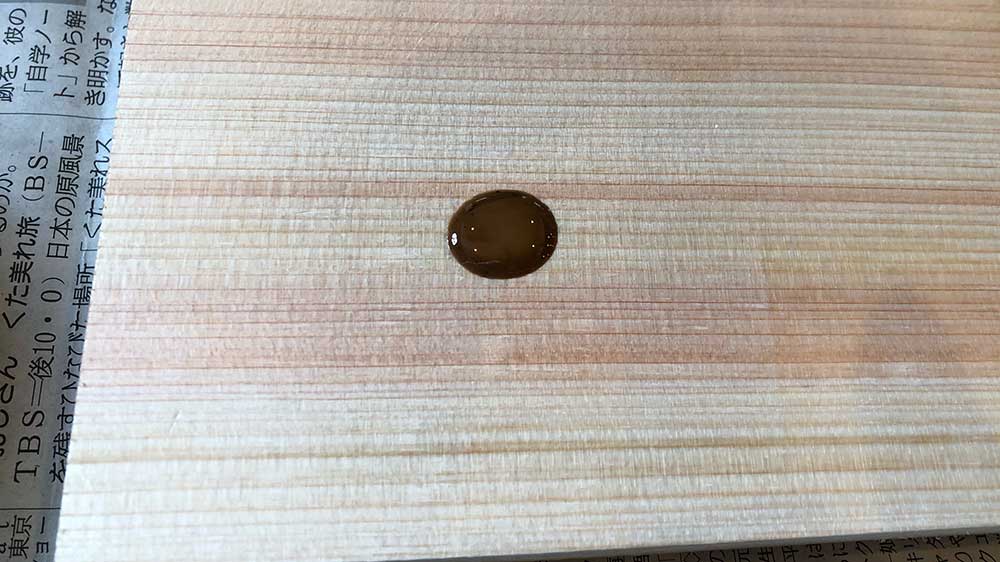
In Soni Village, they produce lacquer from the urushi trees they grow.
Urushi, a Natural All-purpose Material
Urushi is an excellent paint. It is so versatile that it has been long used to repair broken ceramics.
But how?
Well, I will briefly tell you how amazingly urushi works (what I am going to write is based on my experience and does not explain the detailed process of kintsugi).
To smooth the edges
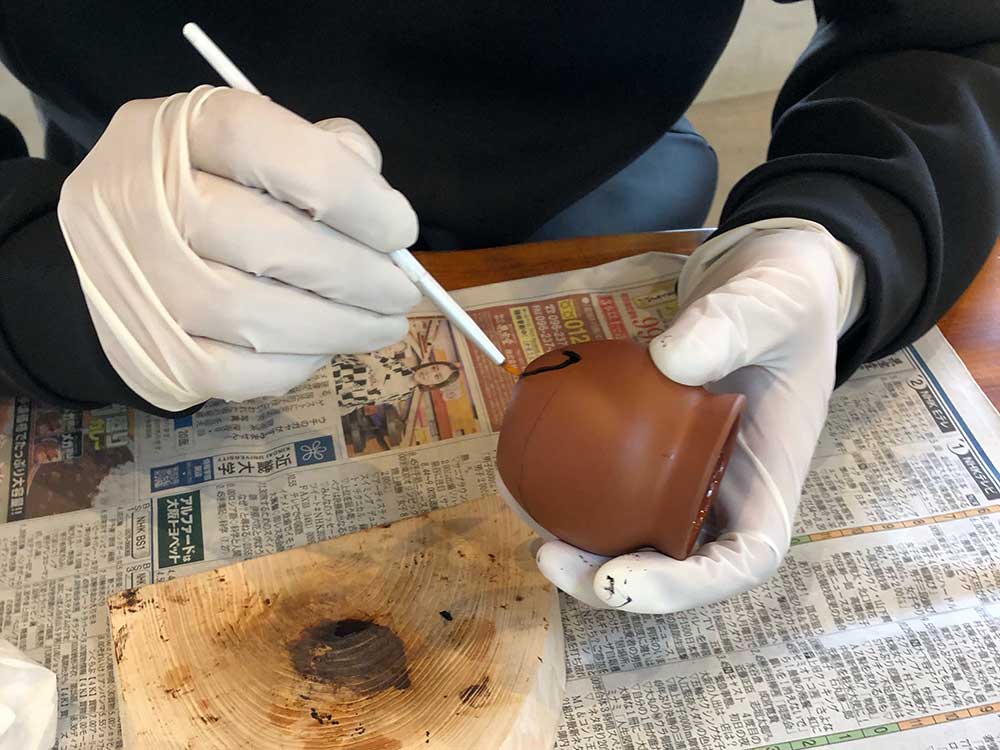
We worked with urushi from the first step. We applied raw urushi lacquer to the cracked and broken edges. This process is considered a pre-treatment before gluing. It does not take much time, but you have to leave the pre-treated pieces to dry for several days. Thus, we completed only one step on the first day.
To boost adhesion
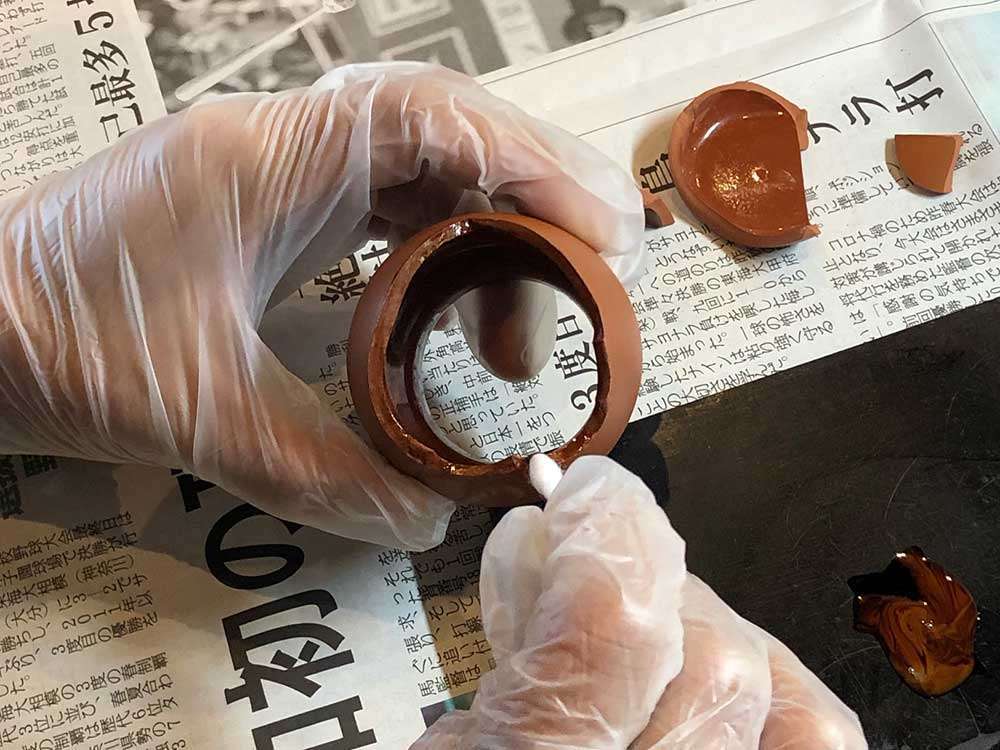
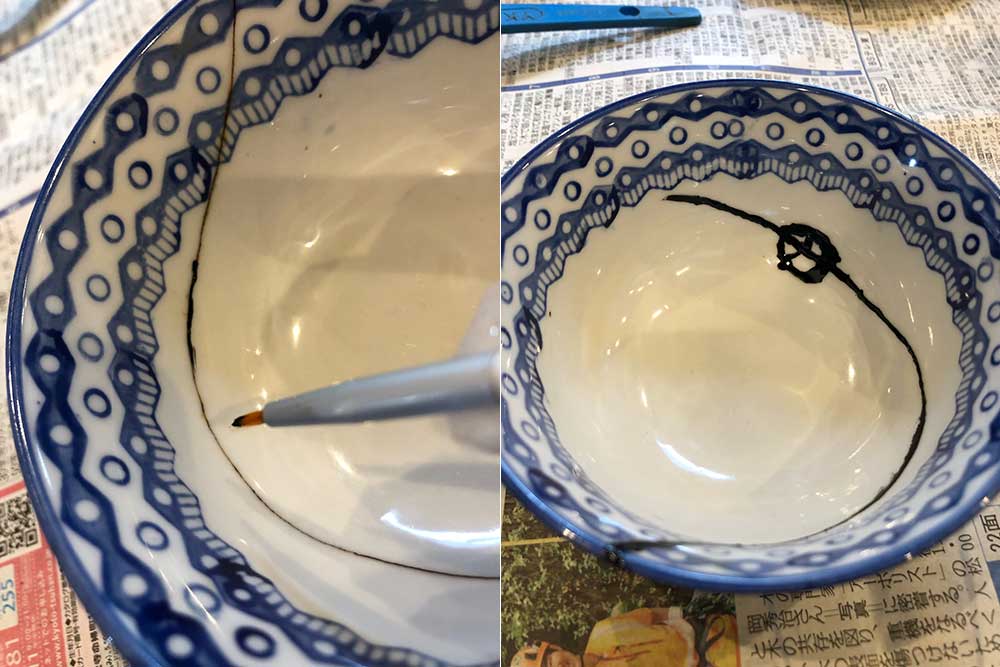
For the second step, we mixed urushi lacquer with flour and applied it to the broken edges and cracked parts. What impressed me the most is that adding urushi to a glue base (here, it's flour) strengthens the adhesion. Urushi boosts its performance when combined with other materials.
To fill chips
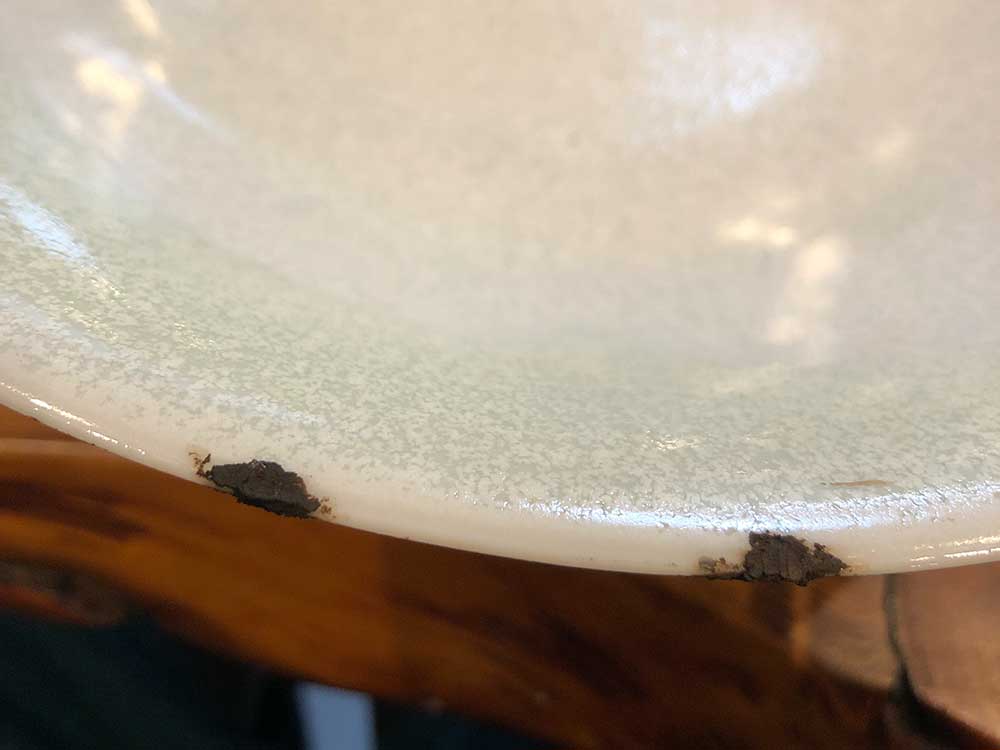
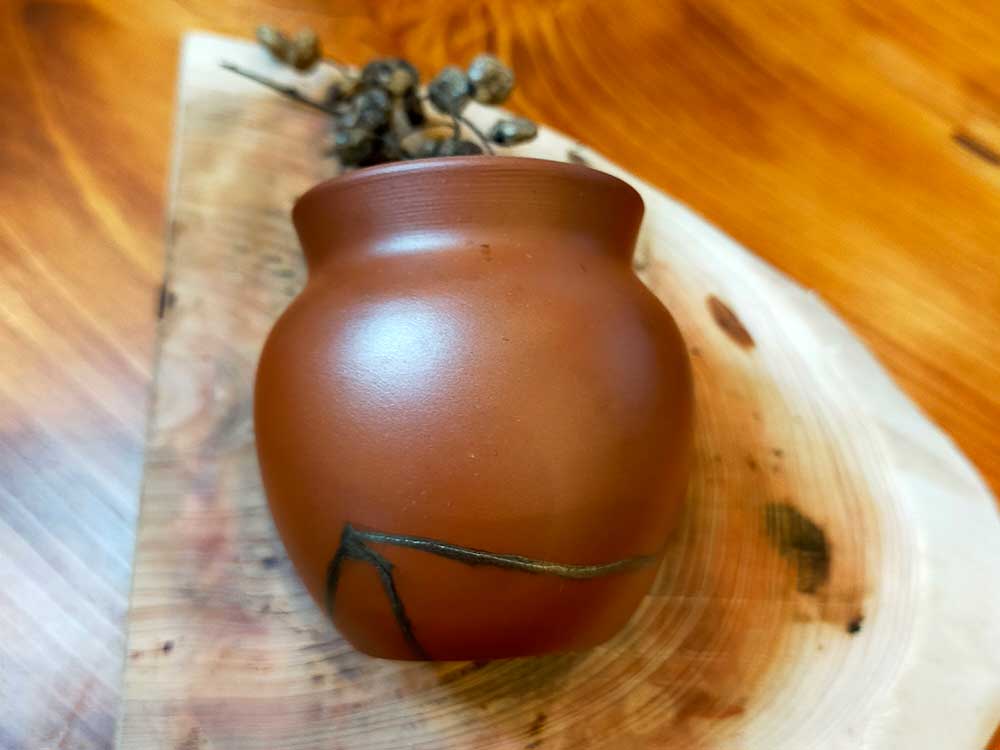
Let’s repair another bowl I brought. This large porcelain bowl, which was a gift from a friend’s wedding, has a few chips on the rim.
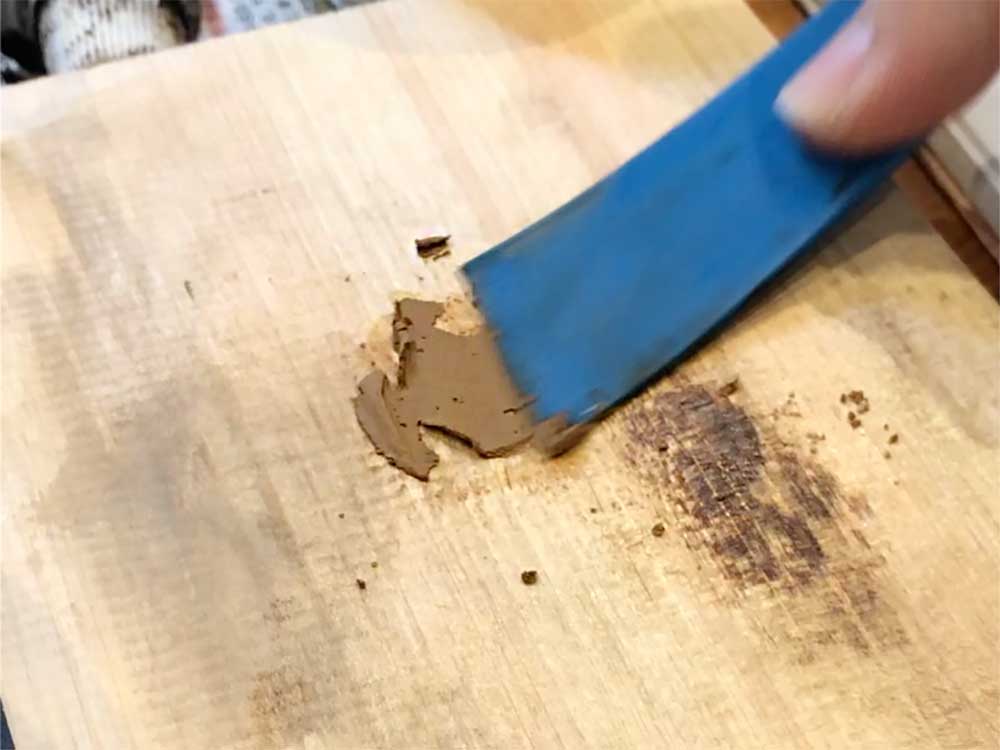
I mixed urushi lacquer with tonoko (clay powder) to make putty. Next, I filled it in the chips and smoothed it with my fingers. Then I had to let it sit for a week or more to dry.
A few weeks later, I filed the dried putty with sandpaper. For your information, urushi dries by absorbing moisture. What a strange material!
To increase strength
Apply urushi, let it dry for a few days, and then file it: repeating this process several times increases the adhesive strength. It is a wonder that sap can bond things so tight. And the ancient people who discovered it are amazing.
As you have probably noticed by this point, traditional kintsugi takes a lot of time. No matter how much time you have, you can’t move on to the next step — everything proceeds according to the convenience of the urushi. I realized something through the gradual progress of kintsugi. It makes me feel that I should spend my time slowly like the people of the past. Today, we are inundated with products created to save time, but originally, people lived slowly, benefitting from nature’s blessings.
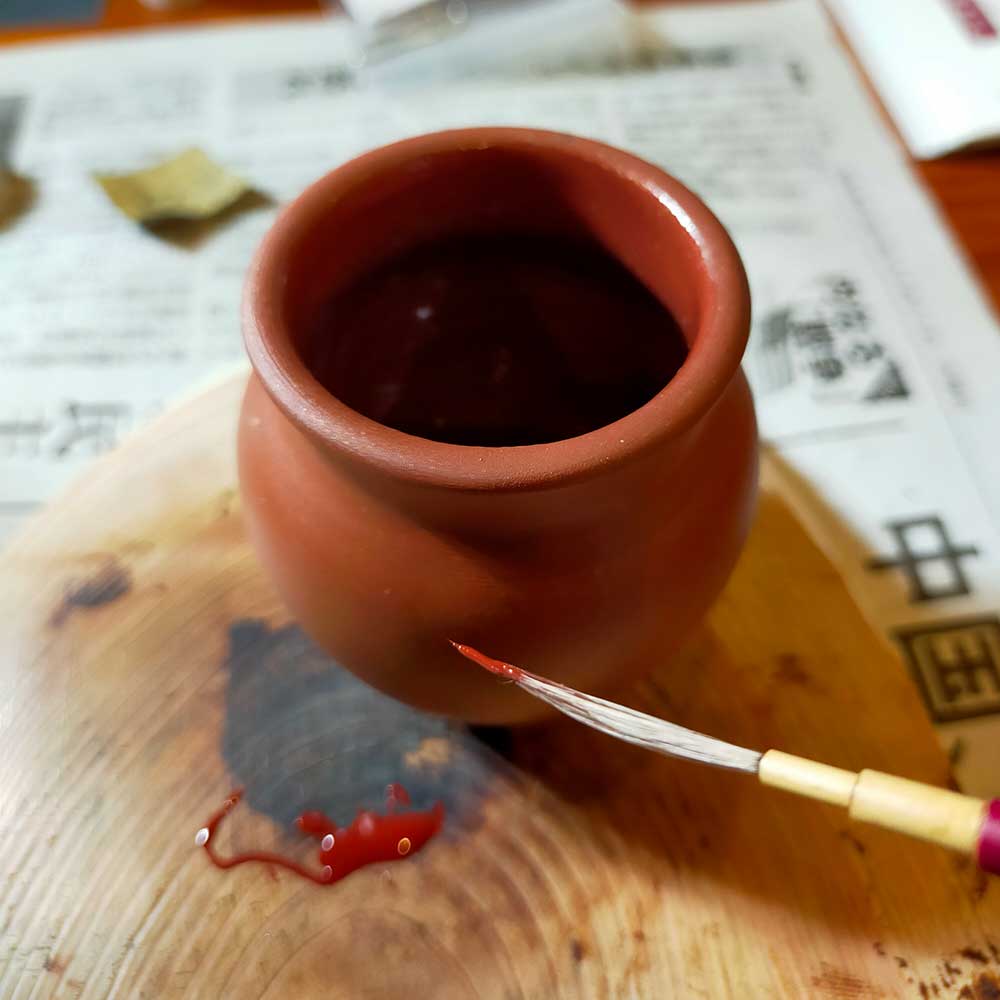
More Urushi before Dusting with Gold
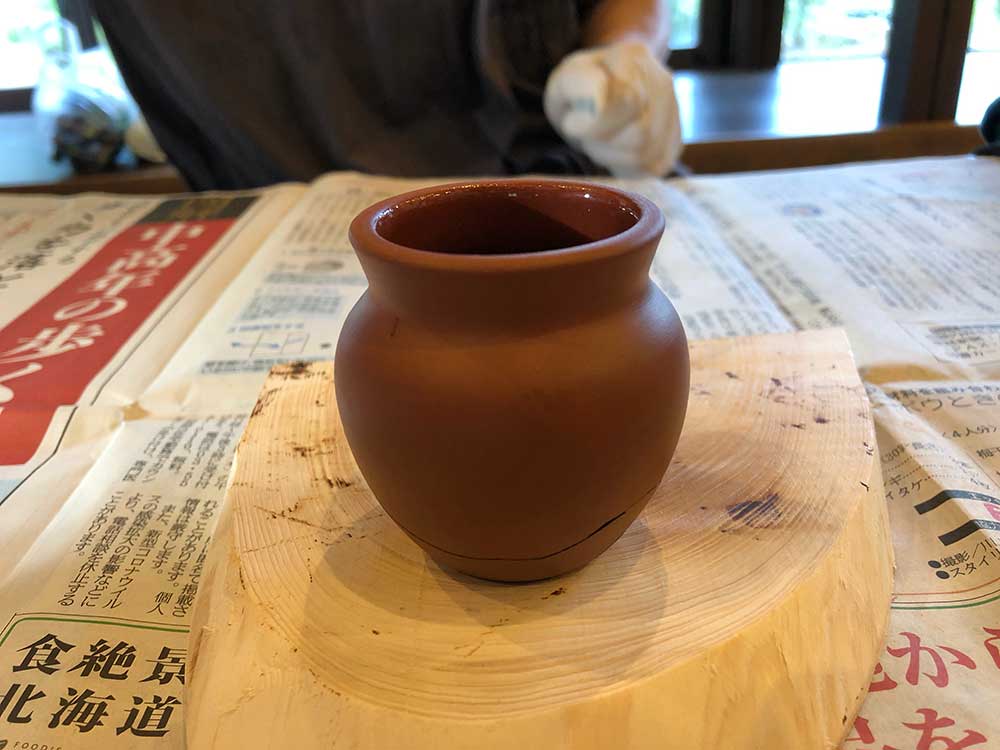
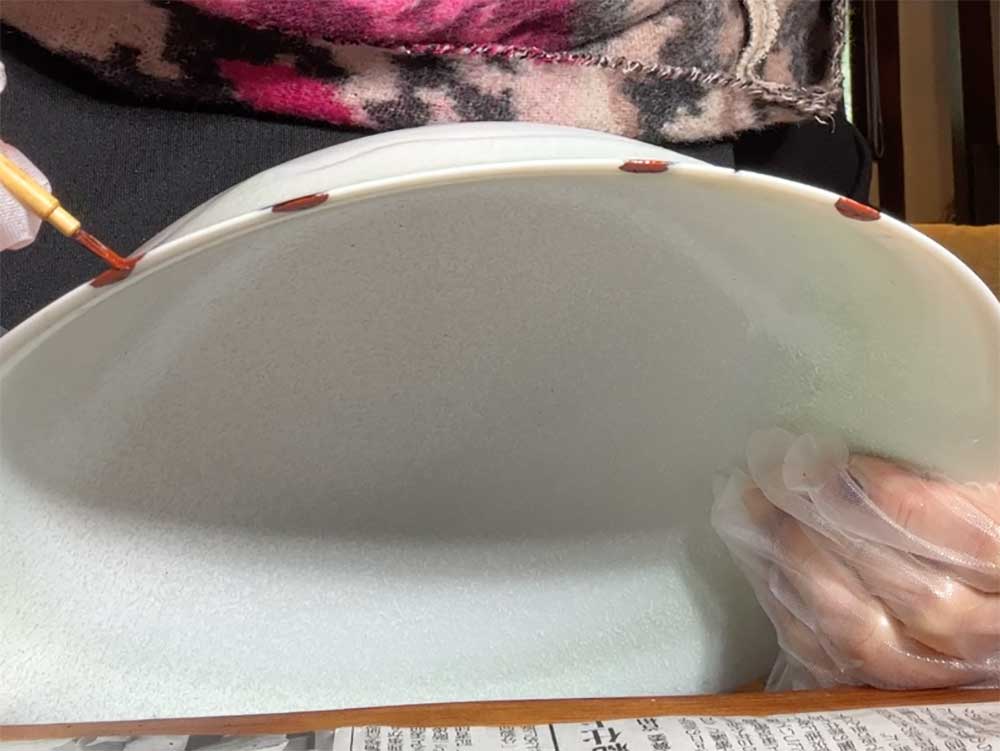
We are one step closer to the powdering process. We applied a base coat of red urushi lacquer over the cracks and chips, as the red tones up the golden color.

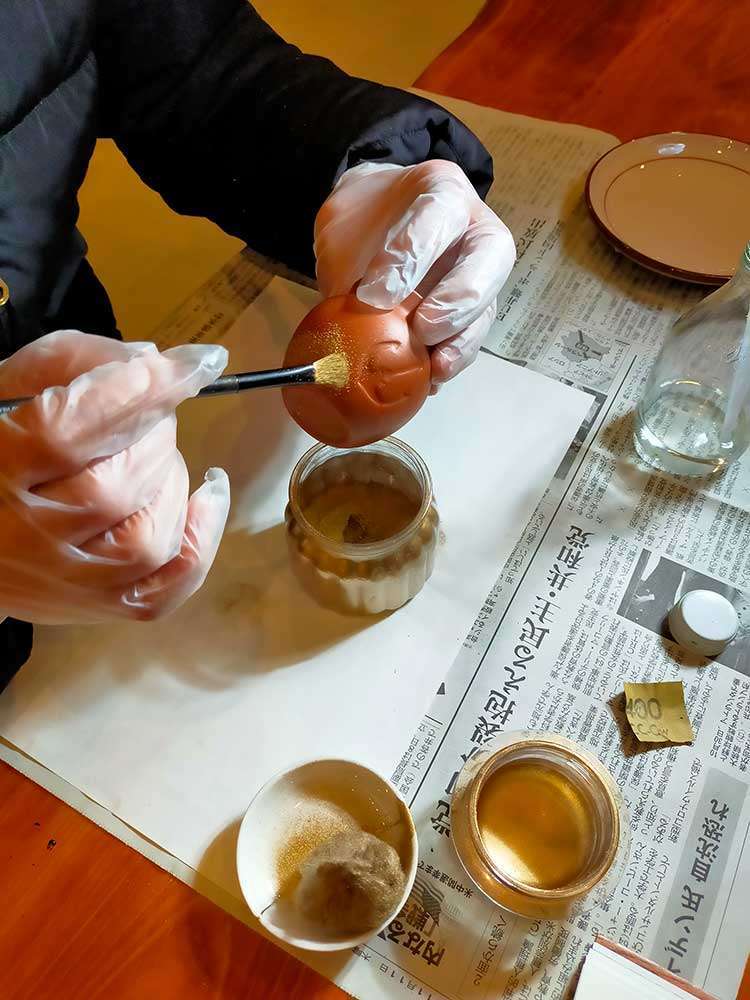
Finally, the Best Part
Now I can get to work with glitter! It's been so long! — it has been more than a year since I started my kintsugi because I took a long break.
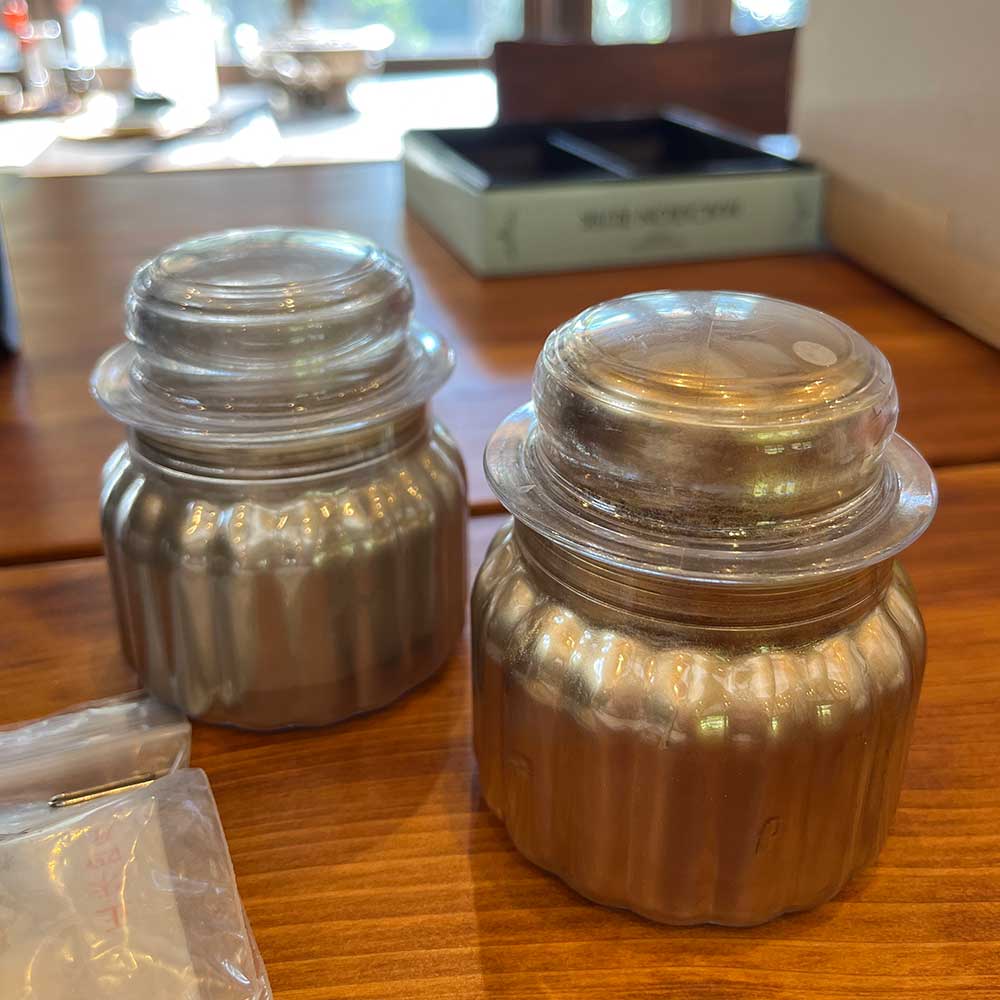
Three types of metal powders were available: brass, tin, and silver. No real gold powder because it is too expensive... Brass results in a golden finish, and tin in a silverish finish. Silver powder gives a whitish finish.
After finishing powdering, we had to leave it for several days again, so the work for the day ended there.
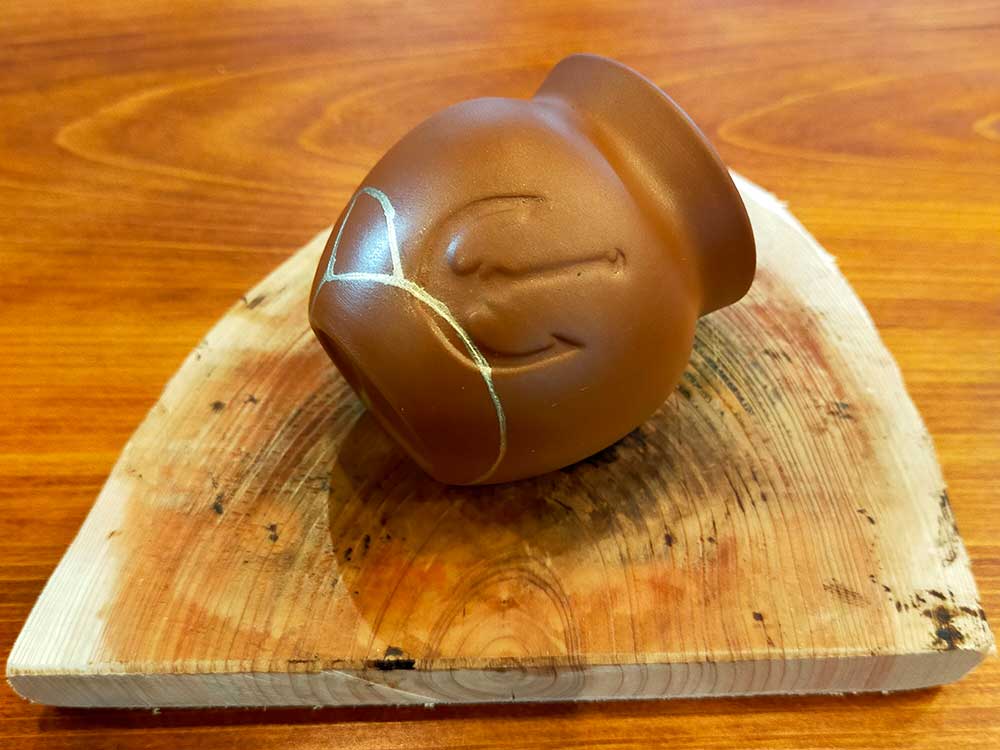
My Kintsugi Finished with Urushi
One week later. This was the last time urushi lacquer was to be applied. We painted on the powdered parts. It works as a top coat to fix the powder.
After we let it dry again for a few days, we buffed it with polishing powder. To use the repaired ceramics as tableware, you have to wait for another three months after all the kintsugi processes are completed.
I hope you find how incredible urushi is. Now you’re interested in trying traditional kintsugi, aren’t you?
There are actually many more steps and methods in addition to the work described here. While time-saving modern kintsugi is one thing, I encourage you to try traditional kintsugi someday. You will discover the power of urushi, a 100% natural material.